This week, I am linking up to Blog Hoppin' to share some wonderful things with you this week!
Hmmmm. How do I stay organized?? I actually wrote a blog Fall talking explaining how I do this. To check out that post click here. Don't worry, if you want to finished reading this blog first and then hop over to my blog from last year, I will add the link at the end too!
I haven't changed much up since then but I will share a couple new things that I have added this year..or just forgot to put in that blog!
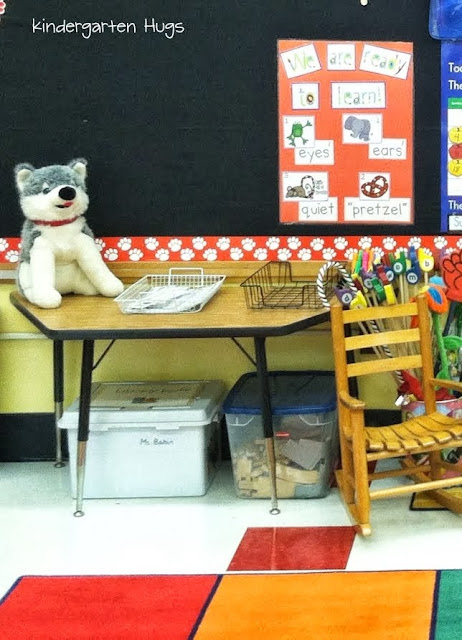
How many of you have papers without names on them at the end of the day?? I know I used to have SEVERAL!! Now, I have a tip to help you, help your students remember that VERY IMPORTANT step! Below you will see a trapezoid table with two baskets on it and hiding behind those pointers is a container with highlighters in it. When students go to turn in their work, they must highlight their name with ONE swipe of the highlighter ( I had to make that rule because students would spend 5 minutes up there "coloring" their name). They highlight their name as a way of self-checking...making sure they wrote their name on the top of their paper. If their name is not their, they can't highlight, so they have to go back to their seat, write their name and come back.
Once their name is highlighted, they put their paper in the white basket if their work in NOT finished and put their paper in the BLACK basket if their work IS finished.
Last year I used this shelf for something else and it became messy and cluttered so I decided to use it more wisely this year. This shelf will hold student work supply baskets and pencil boxes. In the baskets I have community supplies such as bottled glue and markers. Then in the open space on the shelf, students will put their pencil boxes away when they are not in use. This will help keep the tables from being so cluttered (especially with class sizes constantly growing). Next to the shelf is the 3-drawer storage unit. This storage unit is actually my "Creative Center". The top drawer holds all different types of scissors and tape for students to make their masterpieces. The next drawer holds different types and colors of paper and the 3rd drawer holds all different kinds of stickers. Student's take what they need from the drawers, go back to their seats and start getting CREATIVE! They are located next to the supply shelf so that students can easily access their glue and markers as well!
Last thing I will share today is how I organize worksheets and lessons for each day. Next to my desk, I have an organizing pocket chart. It has ten pockets that hold file folders perfectly. I have a file folder for each day and then a few for extra things that I have or do within my classroom. The top one is where I keep copies of my morning work that students do each day. Then in each day of the week folder, I put all copies of any worksheet, game, poem, or book that we will do in that folder. This way, when a sub comes in, all she has to do is grab the folder and he/she is good to go for the day. You will also notice a green hanging folder under my calendar. This is my sub-folder. Again, easy to find and access. Lastly, one the desk, next to the hanging pocket chart is a black magazine holder. This holds any copies that are ready to go for next week. That way, I can just grab and stuff in the folders on Friday.
These were just a few organizatial tips for you, to see more from my blog post from last year click on the link below!
Join me tomorrow as I share all about Classroom Management in my classroom!
Don't forget to hop on over to Blog Hoppin' today though to see more organizational tips from other bloggers!


