
I took both of these sources and combined them to make a Butterfly Garden in the hallway above my students lockers. I chose to do this because we had just finished up our unit on plants, and we had drawn flowers to hang in the hallway and our next unit was Butterflies!
I started by reading the lessons on Deep Space Sparkle and watching the lesson on Line from Arts Attack so that I was prepared and knew where to start. Caterpillars were first because caterpillars come before the Butterfly.
Each student got a 8.5 X 11 piece of any color paper to practice on. Students come to the carpet with their clipboard and a black felt tip marker. On the smartboard, I brought up the painting "Woman in a Purple Coat" by Henri Matisse. In this painting there are several different types of line to show the students (thick, think, straight, curvy, contour, parallel...). As we discussed each of these lines, I modeled how to make that kind of line and then had the students do the same.

 |
| If you notice, the practice sheet is the purple sheet next to her work. |
I turned them loose and let them design their caterpillar making sure that each circle was different.

Since the caterpillars looks so incredibly awesome in black and white, I decided not to have them color them. We just cut them out and hung them in the hallway with our flowers, since caterpillars like to munch on leaves!

Then since our caterpillars turned out so incredibly "cool", I decided to have students do the same with our butterflies. When I teach about drawing, designing and coloring butterflies, I also teach about symmetry. Thus, when the students drew a line on one side of the butterfly, they had to go to the other side of the butterfly and do the same. Again, I did some example lines and then sent them to their seats to get started. This time instead of leaving our butterflies black and white like we did the caterpillars, We colored our butterflies in with crayon.
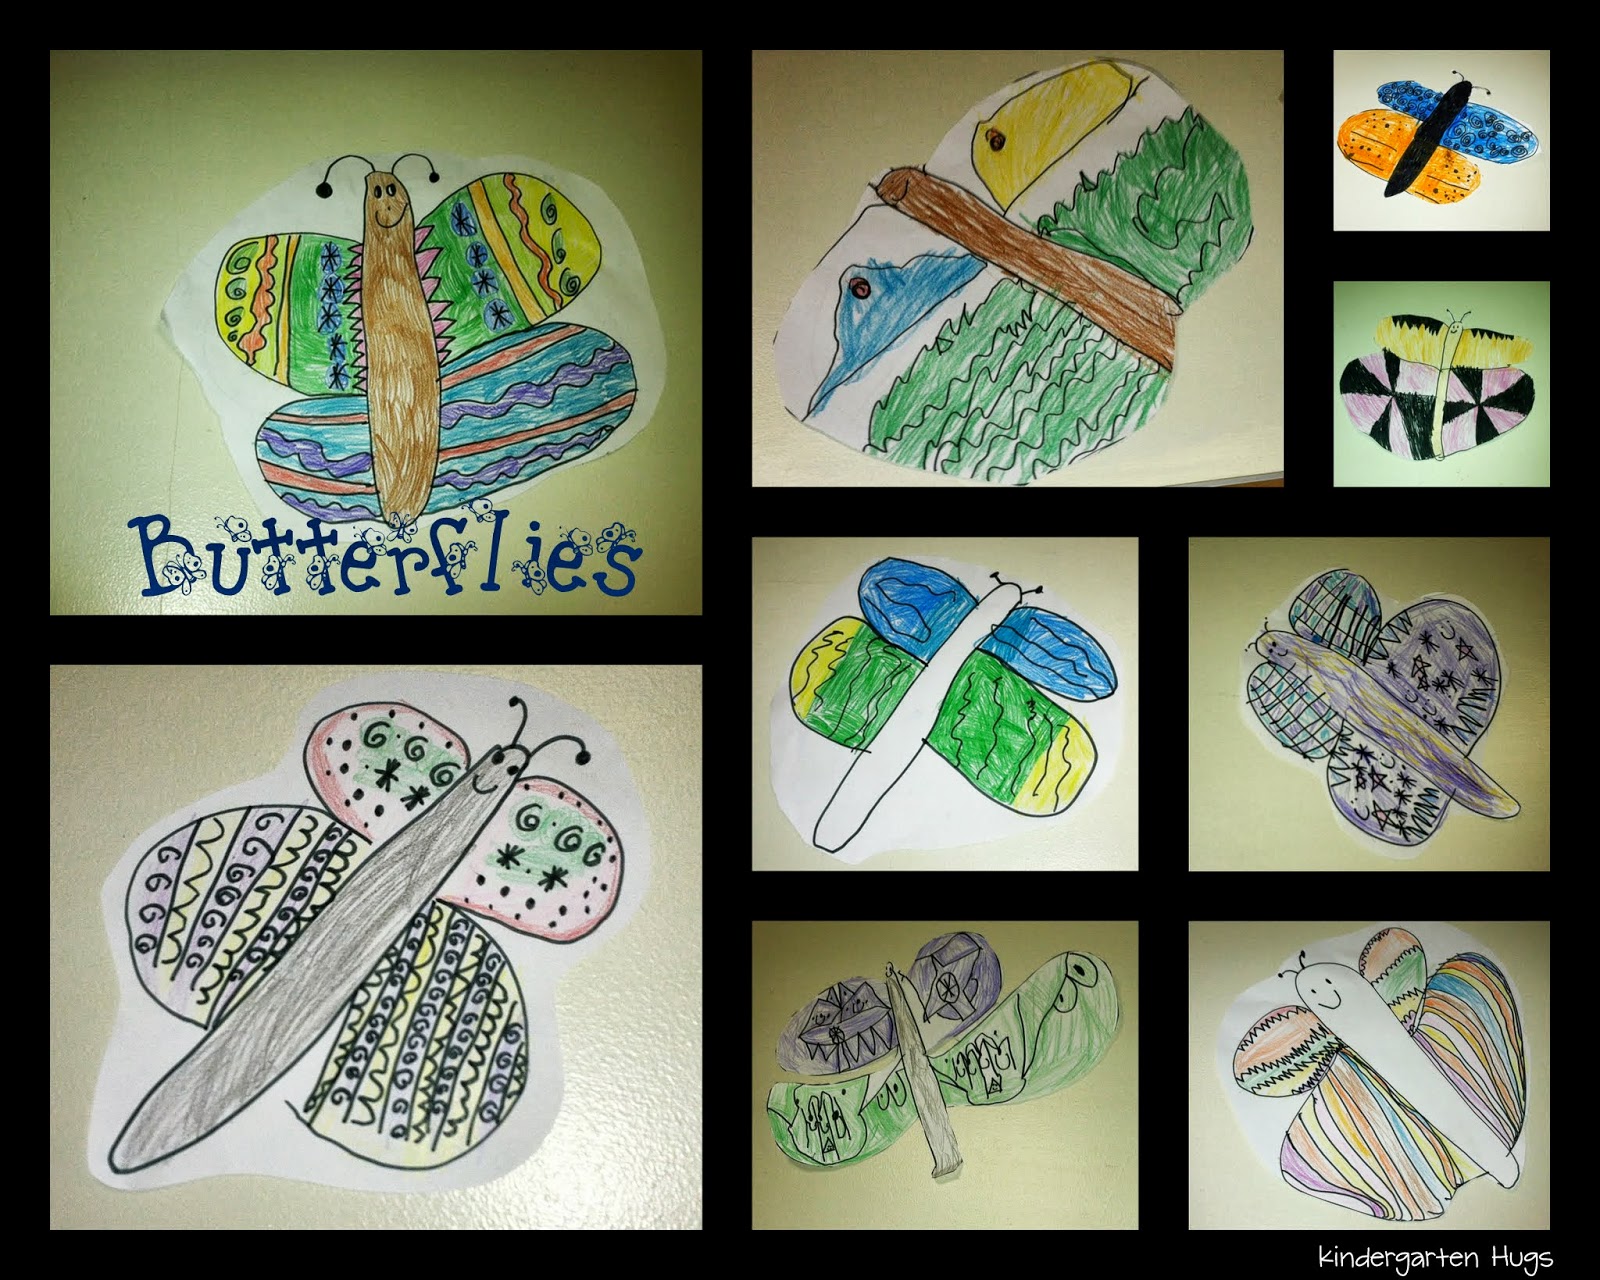
When the butterflies were finished...they were hung in the butterfly garden above the flowers and caterpillars!


We finished up just in time for our real live butterflies to come out of their chrysalis's. We came to school today to discover that FIVE of our six butterflies popped out to join us!!! How exciting for a MONDAY!!!!

I hope you all have a fabulous week!
We are off to the zoo on Thursday! My FAVORITE place for a field trip!


No comments:
Post a Comment